* Estimated delivery times start from the date of shipment, excluding processing time.
* Actual delivery times may vary due to holidays, weather conditions, or customs delays.
Terugkeer items sal aanvaar word binne 40 dae wanneer dit die datum van ontvangs van die goedere is. Aangepaste items kan nie teruggegee of omgeruil word nie. Items gekoop met 'n e-geskenkbewys is slegs omruilbaar; terugbetalings is nie van toepassing nie.
Gratis Geskenk
Welkom by Roymall, jou professionele webwerf vir die aankoop van premium afdelingswinkel geskenke. Ons waardeer en waardeer jou ondersteuning, en ons wil ons dankbaarheid toon deur 'n ekstra tikkie opwinding by jou aankope te voeg. Wanneer jy by ons shop, kry jy nie net hoë gehalte produkte wat jou lewenstyl verbeter nie, maar jy sal ook 'n eksklusiewe gratis geskenk met elke bestelling wat jy plaas ontvang. Gereed om ons versameling te verken en jou perfekte geskenke te vind? Blaai deur ons keuse van premium afdelingswinkel items, plaas jou bestelling, en sien uit na die opwinding van jou gratis geskenk wat saam met jou aankoop aankom.
Gestuurbeleid
Ons sal hard werk om items aan u te lewer nadat u bestellings ontvang het en sorg dat hulle veilig aankom. Afleweringsbesonderhede sal in u bevestigings-e-pos verskyn.In die meeste gevalle word bestellings binne 2 dae verwerk.Onder spesiale omstandighede sal dit soos volg vertraag: Wanneer u 'n bestelling plaas op Saterdag, Sondag of openbare vakansiedae, sal dit met 2 dae vertraag word.Normaalweg benodig dit 5-7 werksdae (Maandag tot Vrydag) sonder om deur vlugvertraging of ander omgewingsfaktore beïnvloed te word.Omdat ons versending wêreldwyd is, sal die afleveringstye van u ligging afhang, so dit mag 'n paar keer neem en wag asseblief geduldig as u in afgeleë distrikte of lande is.
1. Terugkeer & Omruilingsbeleid
Ons aanvaar slegs items wat van roymall.com gekoop is. As u by ons plaaslike verspreiders of ander kleinhandelaars koop, kan u dit nie aan ons kant teruggee nie.Finale verkoop items of gratis geskenke is nie aanvaarbaar vir 'n terugkeer nie.Om in aanmerking te kom vir 'n terugkeer, moet u item ongebruik en in dieselfde toestand wees as wat u dit ontvang het. Dit moet ook in die oorspronklike verpakking wees.Nadat u terugkeerinstruksies van ons ontvang het, verpak asseblief u teruggekeerde items en los u pakkie by die plaaslike poskantoor of 'n ander koerier.Ons sal u terugkeer of omruilingsitem binne 3-5 werksdae verwerk nadat ons dit ontvang het. Die terugbetaling sal verwerk en outomaties aan u oorspronklike betaalmetode gekrediteer word.Geen teruggawes of omruilings kan aanvaar word as die produk op maat vervaardig is, insluitend pasgemaakte grootte, pasgemaakte kleur of pasgemaakte druk nie.Het u meer hulp nodig, kontak ons asseblief. service@roymall.com of Whatsapp: +8619359849471
2.Terugbetalingsbeleid
U sal 'n volledige terugbetaling of 100% winkelkrediet ontvang nadat ons die teruggekeerde pakkie ontvang en nagegaan het. Die terugbetaling sal verwerk en outomaties aan u oorspronklike betaalmetode gekrediteer word.Let asseblief daarop dat gestuurkoste en enige regte of fooie nie terugbetaalbaar is nie. Die ekstra gestuurkoste is nie terugbetaalbaar sodra die pakkie gestuur is nie. U is verantwoordelik om hierdie fooie te betaal en ons is nie in staat om dit te laat vaar of terug te betaal nie, selfs as die bestelling aan ons terugbesorg word.Sodra ons u teruggekeerde item ontvang en bevestig het, sal ons 'n e-pos aan u stuur om u te laat weet dat ons u teruggekeerde item ontvang het. Ons sal u ook in kennis stel van die goedkeuring of verwerping van u terugbetaling.As u enige probleme met betrekking tot die terugbetalingsproses het, kontak ons asseblief. service@roymall.com of Whatsapp: +8619359849471
Specification:
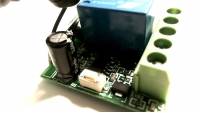
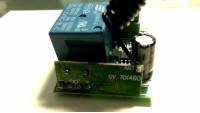
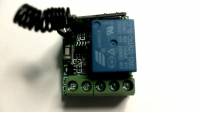
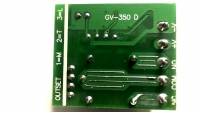
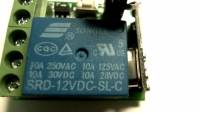
1.Input Voltage: DC10-14V 2.Standby Current: <5MA 3.RF Frequency: 433MHZ 4.RF Working mode:Super heterodyne receiver 5.Receiver Sensitivity: >90dBm 6.Remote Control Distance: >100 meter(In open environment) 7.Decoding Way: MCU Software decoding 8.Can store the number of remote control:50 9.Support remote control type: Fixed code, learning code 10.Channel: 1CH 11.Multiple working modes: (Jog/Non-Latched ,inter-lock/Latched ,self-lock /Self-Latched,Delay off) 12.Wiring Method:Fixed wiring terminal 13.Working Voltage: DC12V 14.Output Current: 10A 15.Rated load:10A 250VAC / 10A 125VAC 10A 30VDC / 10A 28VDC 16.Output:Normally open,Common,Normally closed 17.Dimension:3.5cm*3cm*1.6cm
Working/output way:
1.Jog/Non-Latched: Press one button is Working /ON. Loosen your finger on the same button is Stop/OFF. One channel switch need one buttons remote control. 2.Self -lock/Self-Latched: Press one button for one time is working/ON. Press the same button again is stop/OFF. One channel switch need one buttons remote control. 3.Inter-lock /Latched: Press one button is working/ON, press another button is stop/OFF. One channel switch need 2 buttons remote control. 4.Delay: Press remote control relay pull-in,release the remote control and begin timekeeping,after 5s,10s,15s will automatically close the relay
Description:
1.Jog: Press the learning button then release, set the mode from the system automatically working mode to action mode, wait for a while, when the board LED off, said it is into the learning state, press the remote control, the system received the signal. The LED flashes 5 times and goes off again. After 3S delay, LED light marked learning success, the system automatically withdraw from the learning state. 2.Self-locking: Press the learning button, then release, press 2 times, the system automatically set to self-locking mode, wait for a while, LED off, it is into the learning state, press the remote control, LED flash 5 times Off. 3S after the delay, LED light learning success. 3.Interlock: press the learning button, then release, press 3 times in succession, the system is set to interlock mode. 4.Delay: Press remote control relay pull-in,release the remote control and begin timekeeping,after 5s,10s,15s will automatically close the relay
Great product, and a great price, however the instructions are somewhat vague and confusing. What you need to do is press the learning button on the module multiple times, so two times to learn a latching code, and three times to learn separate ON and OFF buttons etc.
To cancel all codes, press the button 8 times.
Great product, and a great price, however the instructions are somewhat vague and confusing. What you need to do is press the learning button on the module multiple times, so two times to learn a latching code, and three times to learn separate ON and OFF buttons etc.
Come da inserzione di vendita. Ottimo rapporto qualità/prezzo. Consegna nei tempi previsti.
Purtroppo dalla descrizione dell'inserzione non si capisce molto bene come programmare questi moduli. Ho pensato di essere d'aiuto scrivendo una piccola guida
- RELE' SU ON QUANDO SI TIENE PREMUTO IL TASTO DEL TELECOMANDO RELE' OFF QUANDO SI RILASCIA IL TASTO DEL TELECOMANDO
premere 1 sola volta il pulsante sul modulo
il led sul modulo rimane acceso
premere il pulsante del tasto del telecomando che si vuole programmare
il led sul modulo flash 2 volte e poi si spegne
- RELE' SU ON PREMENDO IL TASTO SUL TELECOMANDO RIMANE SU ON ANCHE DOPO AVERLO RILASCIATO RELE' SU OFF QUANDO SI PREME LO STESSO TASTO DEL TELECOMANDO
premere 2 volte il pulsante sul modulo
il led sul modulo rimane acceso
premere il pulsante del tasto del telecomando che si vuole programmare
il led sul modulo flash 2 volte e poi si spegne
- RELE' SU ON SE SI PREME UN TASTO SUL TELECOMANDO RELE' SU OFF SE SI PREME UN ALTRO TASTO SUL TELECOMANDO
premere 3 volte il pulsante sul modulo
il led sul modulo rimane acceso
premere il primo pulsante del tasto del telecomando che si vuole programmare come ON
premere il secondo pulsante del tasto del telecomando che si vuole programmare come OFF
il led sul modulo flash 2 volte e poi si spegne
- RELE' SU ON PER 5 SECONDI
premere 4 volte il pulsante sul modulo
il led sul modulo rimane acceso
premere il primo pulsante del tasto del telecomando che si vuole programmare come ON
premere il secondo pulsante del tasto del telecomando che si vuole programmare come OFF
il led sul modulo flash 2 volte e poi si spegne
- RELE' SU ON PER 10 SECONDI
premere 5 volte il pulsante sul modulo
il led sul modulo rimane acceso
premere il primo pulsante del tasto del telecomando che si vuole programmare come ON
premere il secondo pulsante del tasto del telecomando che si vuole programmare come OFF
il led sul modulo flash 2 volte e poi si spegne
- RELE' SU ON PER 15 SECONDI
premere 6 volte il pulsante sul modulo
il led sul modulo rimane acceso
premere il primo pulsante del tasto del telecomando che si vuole programmare come ON
premere il secondo pulsante del tasto del telecomando che si vuole programmare come OFF
il led sul modulo flash 2 volte e poi si spegne
RESET
- premere 8 volte il pulsante sul modulo
il led sul modulo flash 4 volte e poi si spegne
Tips:For questions about your order, place of delivery, product discount, taxation, delivery time, warranty, shipping, payment, exchange rate, and other questions unrelated to the product, please contact customer service.
showing 1-12 of 12|
Show Original
A part of the QA has been auto-translated.
0
Q:
is my understanding correct, that channel could operate with 220V up to 10A? so I can switch on / off heater up to 2KWt and lamps?
Can I use four of this Single channel receivers with a 4-button control transmitter? Can the 4 buttons of the transmitter operate 4 separate receivers?
Yes it can. each button on the four button remote can control a different receiver or each button can control multiple receivers. I have just tested it, works well either way.
Answered by fishing_phil on 26/03/2019Helpful (0)
0
Q:
when i reset the relay with push the buttom 8 x times the relay going out of work. can not program now, only the led flash when i push any buttom of the remote. before i push the buttom 8x times, the relay works perfectly.
Hello, Could anyone advice how to add local button / switch to this module to male it work by its press like from radio module (in parallel)? I see Do pins on radio module, but can not reverse how it sends commands to controller... Maybe anyone did the same.
you just connect an external switch in parallel (either as a pushbutton as on-while-hold or a permanent on-off). I you dont know how to connect a switch in parallel, dont mess with it.
Answered by Gearlos on 04/04/2023Helpful (0)
0
Q:
Do you have a wring diagram and programming instructions?
you can use this remote control:https://www.banggood.com/433Mhz-Transmitter-Wireless-Remote-Control-Switch-12V-4CH-Channel-p-1018573.html it learn code from the receiver
Answered by Lolboat on 07/04/2018Helpful (0)
Ask a Question
1.You can contact the customer service. for any question regarding the product.
2.Ask the question in English to get answer faster.